周回レイアウトをつくる〜端を整えてコピー (Make a loop ~ Arrange ends and copy)
周回レイアウトをつくるテクニック、「端を整えてコピー」について学ぶ。
To learn one of techniques to make a loop, “Arrange ends and copy."
プラレールできちんと周回レイアウトをつくるのは、意外と奥が深いです。
It may not be always easy to build a loop which is geometrically correct.
普通の円とか長円みたいなわかりやすい形だと簡単なのですが、曲線レールをクネクネ組んだりした途端、最後がうまくつながらない事件が起こるようになります。
For sure it’s easy to make a simple circle or an oval, however once you use curve rails in s-shape, you may find it difficult to connect the last joints nicely.
プラレールのつなぎ目にはいわゆる遊びがあるので、使うレールの数が多いほど、多少ゆがんでいてもつなぎきれてしまったりします。それはそれでオッケーです。もし子どもが「できた!」と喜んでいたら、明らかにゆがんでいても一緒に喜んであげましょう。
Thanks to a play at the joint of Plarail, it allows to connect the rails with some misalignment. The greater number of rails used, the more misalignment can be absorbed. That is fine. If kids are happy with their job, be happy for them even if the track is obviously distorted.
ですが、無理矢理つなぐのにも限度はあります。
ここではピッタリ組み上げるためのテクニックのひとつ、「端を整えてコピー」を見ていきましょう。
However, there is always a limit.
We will review one of the techniques to build a geometrically perfect track, “Arrange ends and copy" in this article.
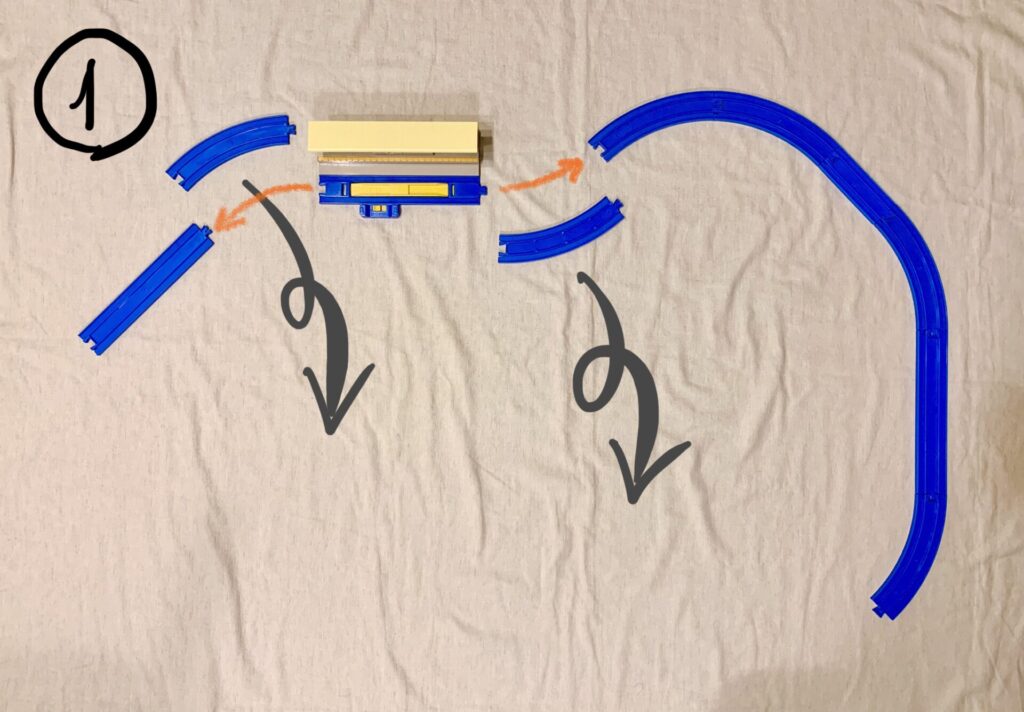
Step 1: 端の向きをそろえる (Align the ends)
まずはレールを足したり引いたりして、両端の向きをそろえます。
片方は直線レール、もう片方は曲線レールでもかまいません。
First, make the both ends face the same direction by adding or subtracting rails.
At each end, whichever straight or curve rail is fine.

プラレールは曲線レール8本をつなぐとひとつの円になりますね。
ですので、曲線レール1本で45°ずつ向きが変わります。
Eight curve rails make a circle.
Therefore, 1 curve rail changes the orientation by 45°.
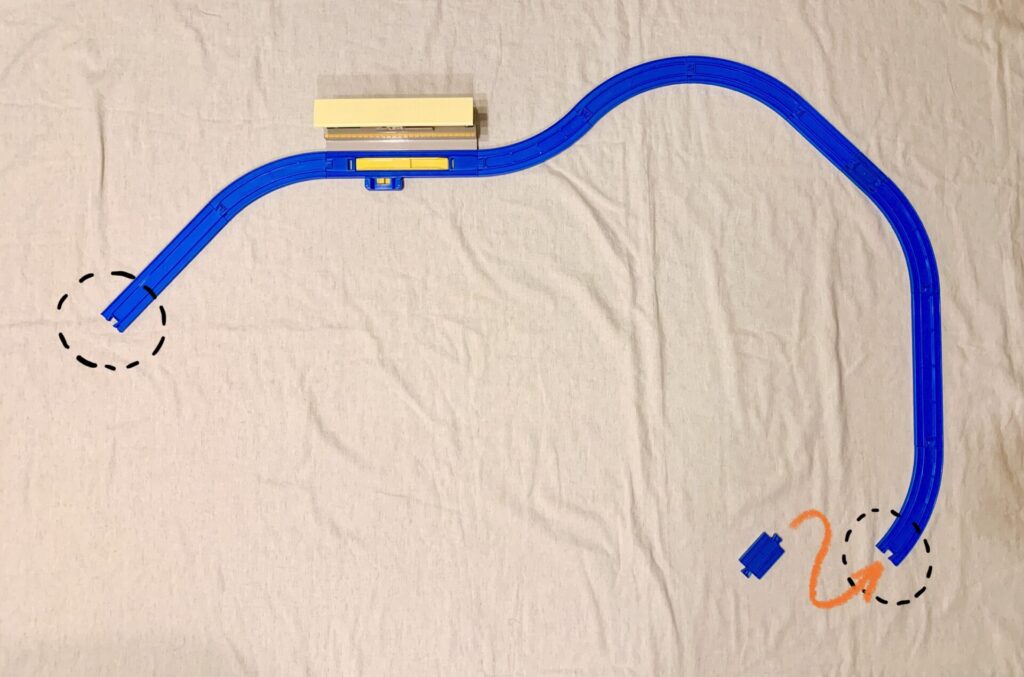
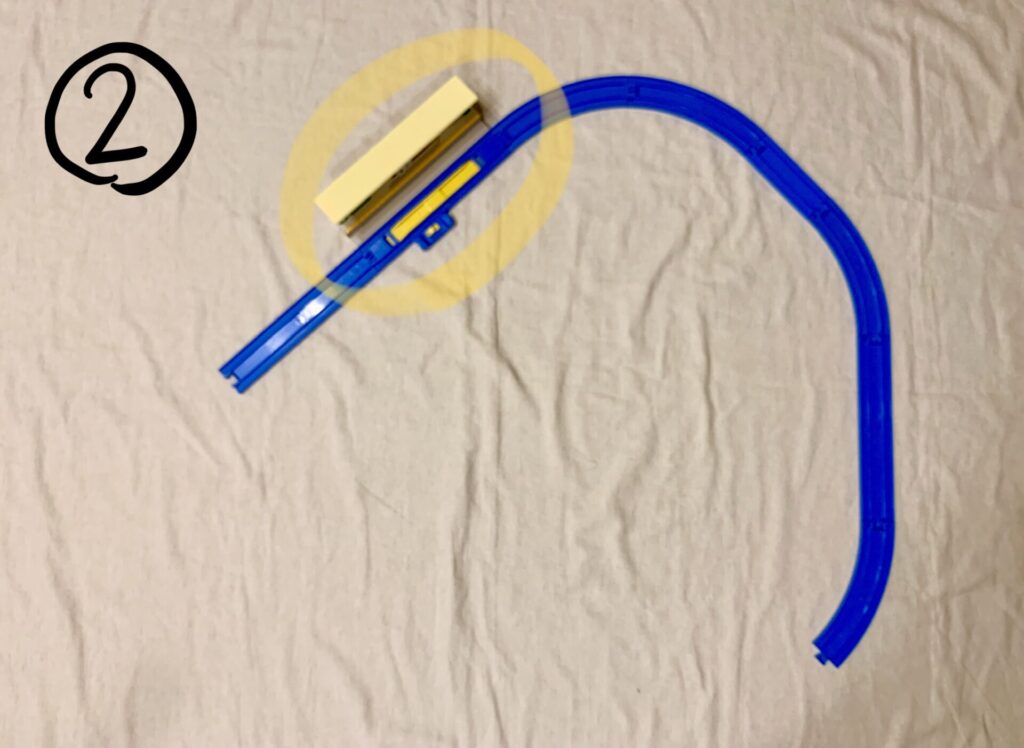
Step 2: つなぎ目の向きをチェック (Check the joints)
途中に1/4直線レールや8の字ポイントレールが入っていると、端どうしが凹凹や凸凸になっていることがあります。
その場合は、1/4直線レールを使って端が凹と凸になるようにします。
When 1/4 straight rail and/or figure-8 point rail is used in the track, the joint of the ends may be female-female or male-male.
In this case, make the ends female-male by using 1/4 straight rail.
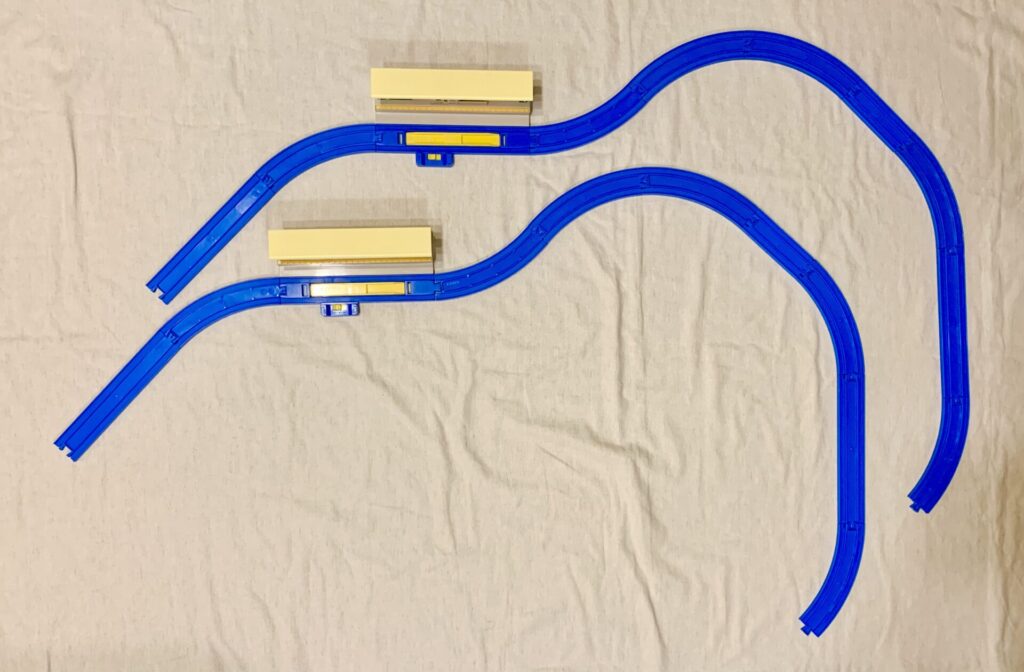
Step 3: 同じものをもう一個つくる (Copy the track)
上で作ったものをそのままそっくりもう一つ作ります。
できたらstep 4に進みます。
Duplicate the track you prepared above.
When it’s done, go to step 4.
…が、レールや情景が足りない!という場合は次のようなテクニックでなんとかします。
…If you don’t have such more rails or scenery parts to do so, use the following tips.
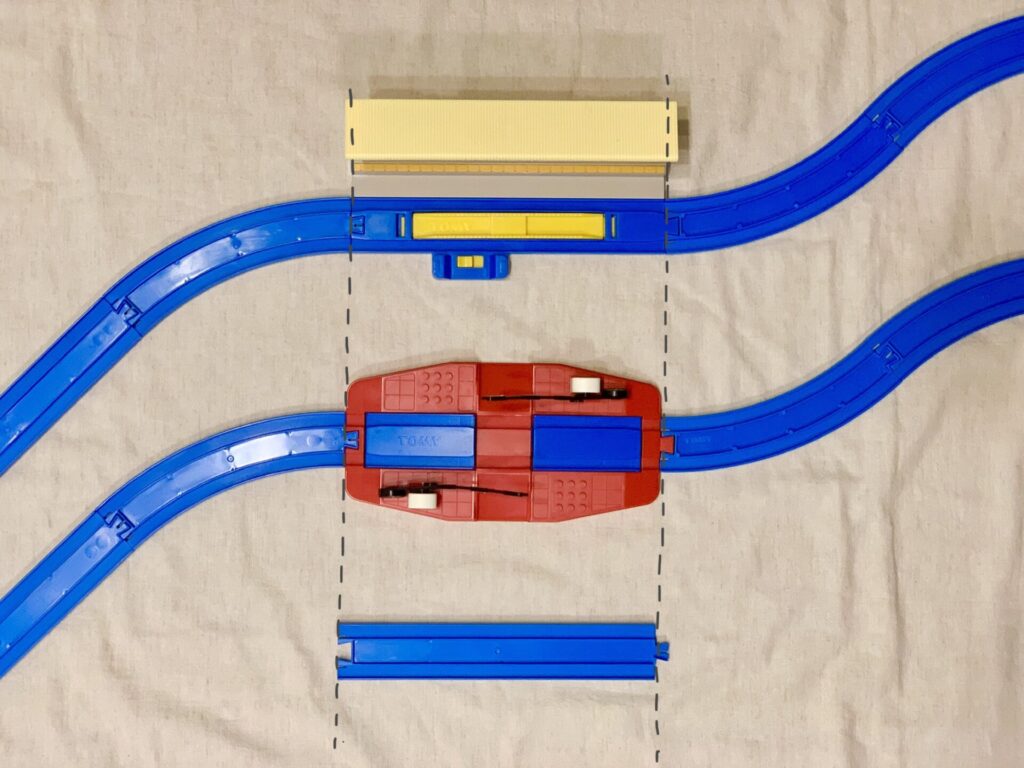
Case 1: 情景が足りない場合 (Shortage of scenery parts)
駅や踏切などの情景部品が足りない場合は、同じ長さの別の情景やレールでまにあわせます。
ほとんどの情景部品は直線レール1本分の長さになっています。
If it’s a scenery part that you don’t have an extra such as a station or a railroad crossing, just replace with another scenery part or a rail with the same dimension on the copied one.
Most scenery parts are designed to be the same length as a straight rail.
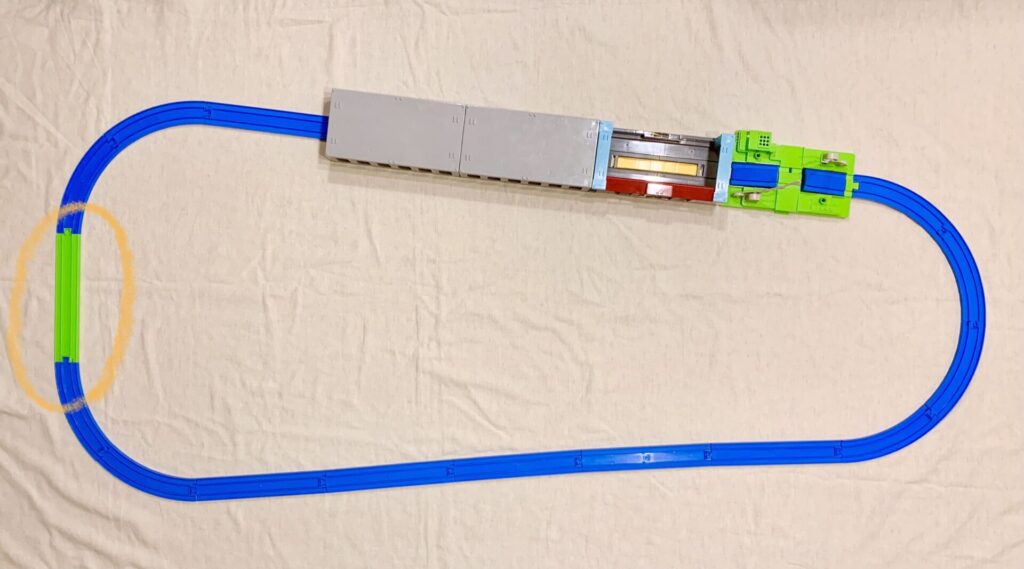
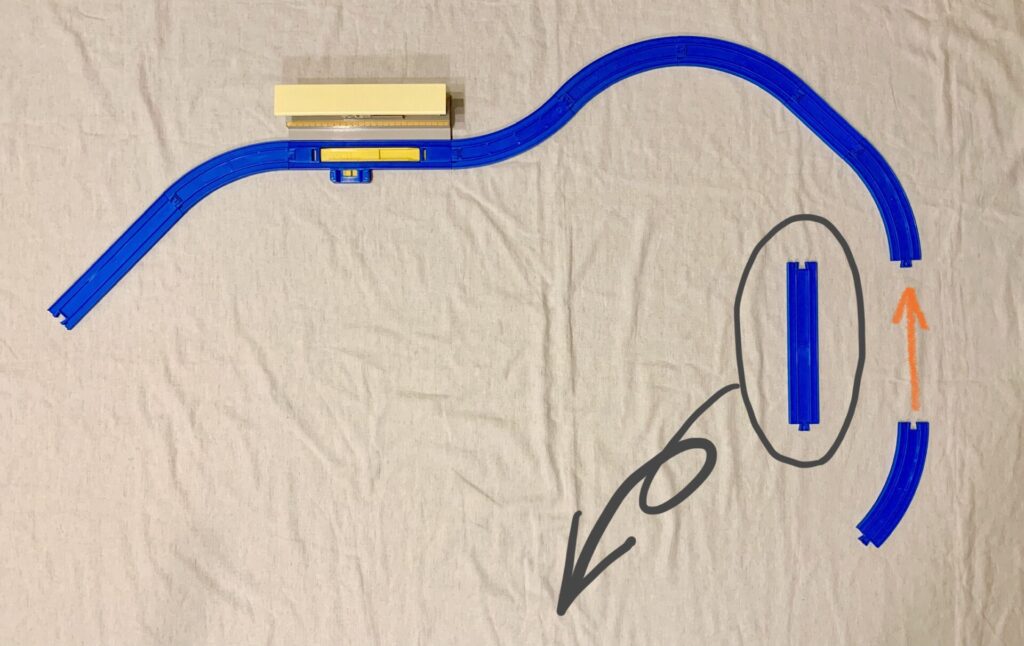
Case 2: 直線レールが足りない場合 (Shortage of straight rails)
直線レールを抜いて、同じものを作ります。
直線レールを足しても引いても、端の向きは変わりません。
Remove straight rail(s) from the original track then copy it.
Adding or subtracting straight rails doesn’t affect the orientation of the ends.
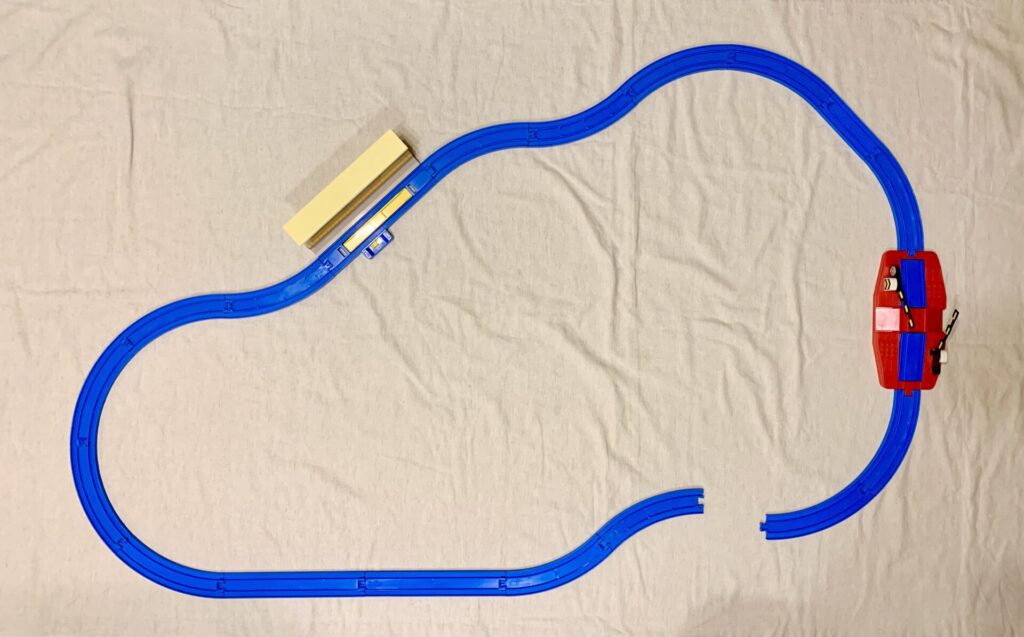
Case 3: 曲線レールが足りない場合 (Shortage of curve rails)
曲線レール2本がS字になっているところを2本とも抜いてから、同じものを作ります。
Identify where a pair of curve rails configure S-shape, remove the both curve rails, then copy the track.
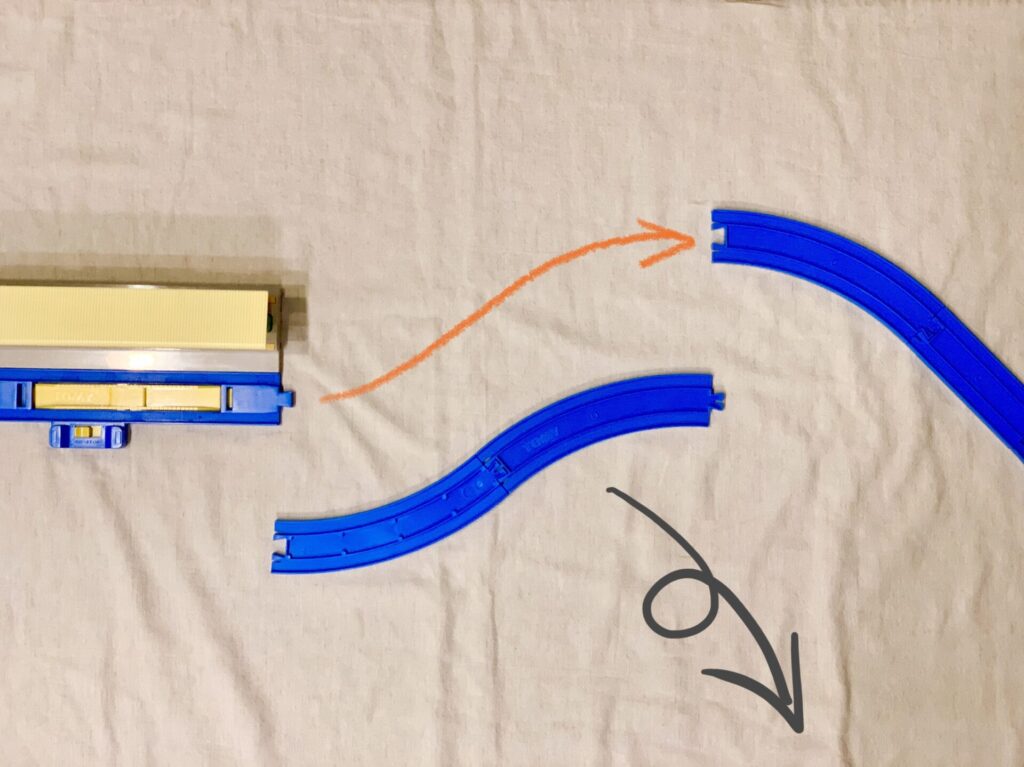
ちょっと難しいですが、S字の途中に直線が入っていてもできます。
Though it may not be easy, it works when straight part is in between as well.
こうして、なんとか2つ同じものができたら、次に進みます。
Could you finally prepare for the two identical tracks? Let’s proceed to the next.
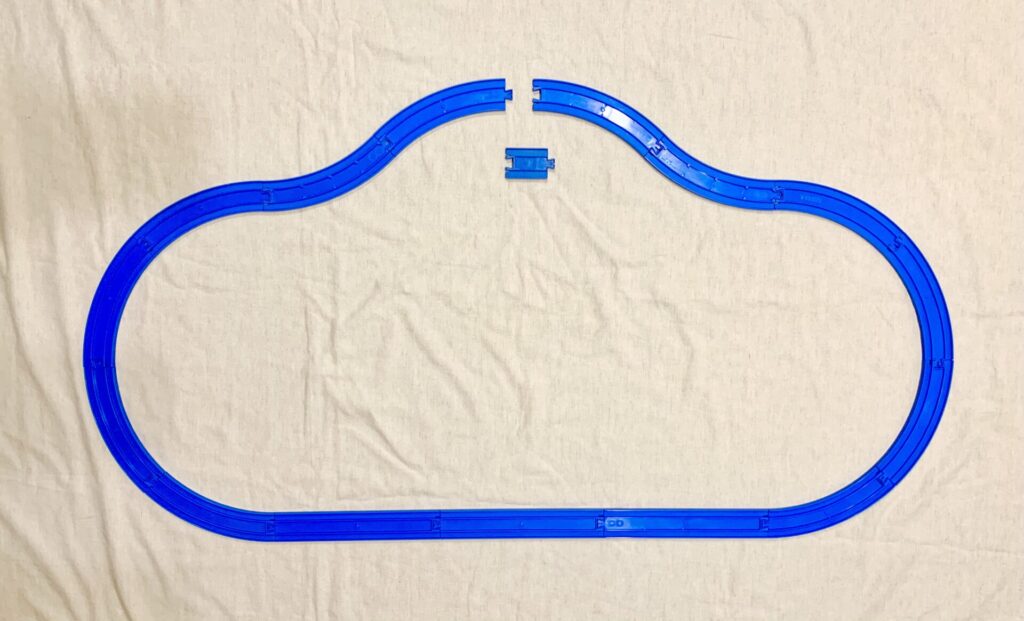
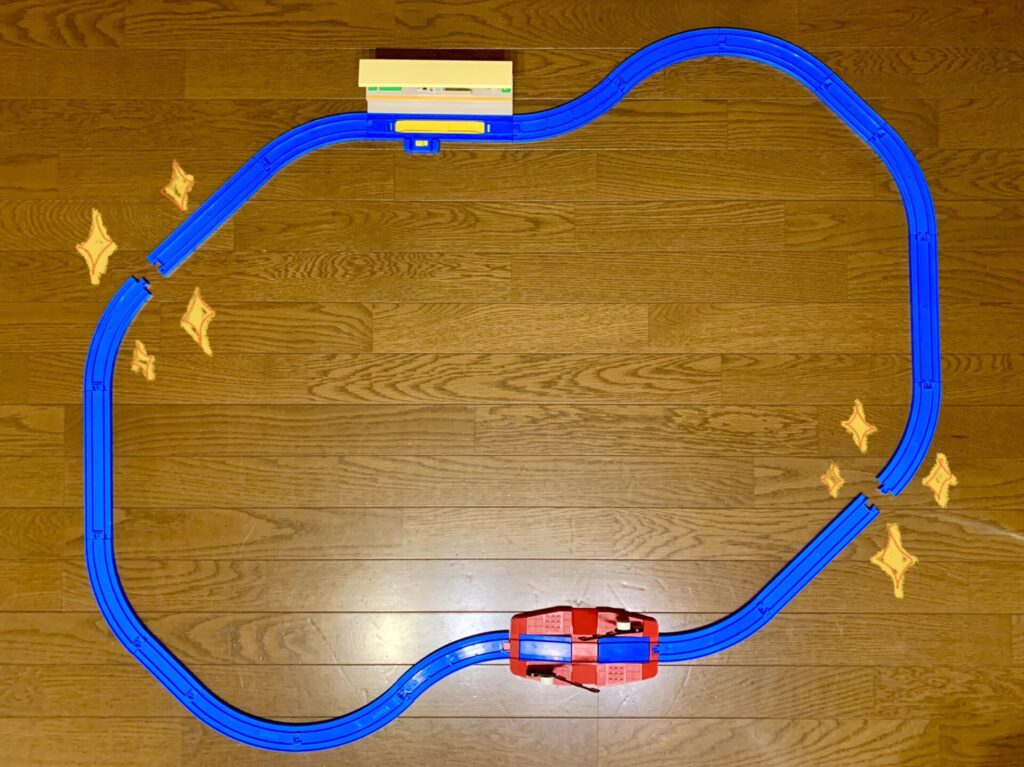
Step 4: 片方を上下逆さまに回して、つなげる (Turn one upside down then connect)
2つのうち片方を上下逆さまに180°回します。
表と裏をひっくり返すのではないので注意。
すると、2つのレイアウトがぴったりつながります。
Turn one of the two tracks upside down (rotate 180°).
Note that it doesn’t mean to turn over.
Then you’ll be able to connect the two tracks perfectly!
いかがでしたか?
どんなクネクネでも必ずピッタリつながる「端を整えてコピー」のテクニックでした。
このあと、分岐や坂を入れてもっと楽しいレイアウトにするのもいいですね。
Would you like it?
It’s “Arrange ends and copy" which makes any winding track a perfect loop.
After this, it’s also fun to add point rails and/or slopes to make your track even more wonderful.